Quick Facts
- Target Distribution: Approximately 80% weight on hips, 20% on shoulders.
- Core Measurement: Torso length from C7 vertebra to Iliac Crest, not total height.
- Load Lifter Angle: Ideal tension is achieved at a 25 to 45 degree angle.
- Sternum Strap Position: Set roughly 1 inch below the collarbone for stability.
- Crucial Fitting Rule: Always fit and adjust with a loaded pack (15-40 lbs).
- Maximum Load Capacity: Fully loaded weight should not exceed 20-25% of body weight.
To achieve the perfect backpacking pack fit, you must measure your torso from the C7 vertebra to the iliac crest and follow a bottom-up adjustment sequence starting with the hip belt to ensure 80% of the weight is transferred to your skeletal structure rather than your shoulders. Getting this foundation right prevents common trail injuries and ensures that the internal frame architecture works in harmony with your natural movement.
Regardless of whether you are planning a weekend getaway or a months-long thru-hiking expedition, the relationship between your body and your gear is the most significant factor in your overall success. A pack that is poorly adjusted can turn a scenic trail into a grueling endurance test marked by sore shoulders, lower back pain, and premature fatigue. The goal of a proper backpacking pack fit is to turn the pack into an extension of your body, where the weight moves with you rather than against you.
Measuring Your Torso Length
When beginners look for a pack, they often make the mistake of choosing a size based on their overall height. However, height has very little to do with how a pack sits on your back. People with long legs may have short torsos, and vice versa. To ensure proper backpacking pack fit, you must base your sizing on your torso length. This measurement ensures the distance between the hip belt and the shoulder straps matches the length of your spine, allowing the internal frame architecture to distribute weight effectively.
To measure torso for backpack correctly, you will need a flexible measuring tape and a friend to help. First, tilt your head forward and feel for the bony bump at the base of your neck where the slope of your shoulders meets your neck. This is the C7 vertebra. This point marks the top of your torso measurement.
Next, find the top of your hip bones, known as the iliac crest. A good way to find this is to put your hands on your waist with your thumbs pointing toward your spine. The line connecting your thumbs is the bottom of your torso measurement. Have your friend measure the distance following the curve of your spine from the C7 vertebra down to that imaginary line between your thumbs.
Once you have this number, you can map it to standard industry sizes. While brands vary slightly, most follow these general guidelines:
- Small: 15 to 17 inches
- Medium: 17 to 19 inches
- Large: 19 to 22 inches
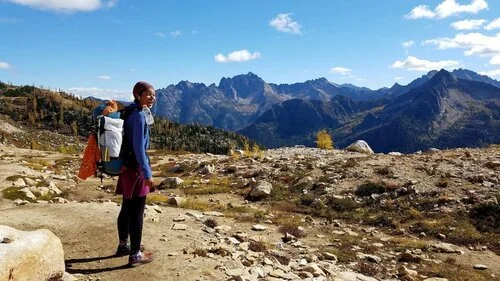
If your measurement falls exactly between sizes, it is usually best to try both on. However, many modern packs offer an adjustable torso feature that allows you to slide the shoulder harness up or down to achieve the perfect micro-adjustments for your frame. Determining how to measure torso length for backpack fitting is the single most important step you can take before even touching a buckle.
Setting the Foundation: The Hip Belt
A common misconception in hiking is that the shoulders should carry the weight. In reality, a properly adjusted backpacking pack should distribute approximately 80% of its weight onto the wearer's hips and 20% onto the front of the shoulders. To achieve this, you must begin your adjustment process from the bottom up.
When you put your pack on, loosen all the straps first. Shrug the pack onto your shoulders and lean forward slightly so the weight rests on your back. Position the hip belt so the lumbar padding nests into your lower back and the belt itself cups the iliac crest. The belt should not be sitting on your soft waist; it needs to be anchored to the bony structure of your pelvis.
Proper backpack hip belt placement for weight distribution requires a snug fit. Tighten the belt until you feel the weight of the pack transfer from your shoulders to your hips. The padding of the belt should ideally wrap around the front of your hip bones, leaving a gap of about 3 to 6 inches between the two ends of the padded sections. If the padded sections touch or overlap, the pack is likely too large for your frame. This solid foundation provides trail stability and ensures your center of gravity remains over your feet rather than pulling you backward.
Adjusting Shoulder Straps and Load Lifters
Once the hip belt is secure, move to the shoulder straps. Pull the webbing down and back to tighten them. The straps should follow the contour of your shoulders and wrap snugly against your back without any major gaps. However, the goal is not to have the shoulders carrying the load. Use the thumb slide test: you should be able to slide your thumb comfortably between the top of your shoulder and the strap. If the strap is digging in, the hip belt isn't doing its job, or the torso length is too short.
Transitioning to the top of the pack, you will find the load lifters. These are the small straps located between the shoulder harness and the top of the pack frame. You need to adjust backpack load lifters to prevent the pack from pulling away from your body, which can cause significant strain on the lower back.
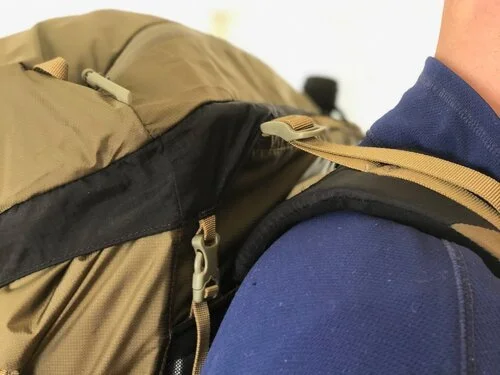
Pull the load lifter straps until they are tensioned properly. Ideally, they should sit at a 45-degree angle between the pack and your shoulders. This angle allows the straps to pull the top of the internal frame closer to your head, aligning the load with your center of gravity and increasing suspension efficiency. Be careful not to over-tighten them; if you pull too hard, you will create a gap at the shoulders, which compromises the stability of the pack. Learning how to adjust backpack load lifters for comfort is often the difference between a pack that feels like a heavy anchor and one that feels like a natural part of your stride. Correcting this helps in avoiding shoulder pain through correct pack strap adjustment, especially during long days on the trail.
Final Stabilizers: Sternum Straps and Compression
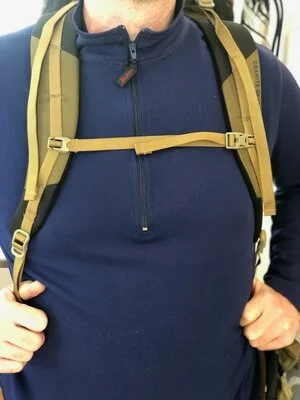
The final step in the sequence involves the sternum strap and the external compression straps. The sternum strap’s primary function is to prevent the shoulder straps from sliding outward toward your arms, which can restrict arm movement and cause friction.
Slide the sternum strap up or down until it sits approximately 1 inch below your collarbone. This is the proper sternum strap height on a backpacking pack to ensure it doesn't interfere with your breathing. Tighten it just enough to keep the shoulder straps comfortably on the front of your chest. If you over-tighten it, you may find it difficult to take deep breaths during steep accents, and it can also distort the shape of the shoulder harness.
Finally, check your compression straps. These are the straps on the sides of the pack body. Once your gear is loaded, pull these tight to compress the volume of the pack. This keeps the contents from shifting while you walk and pulls the weight closer to the back panel, enhancing back panel ventilation by keeping the pack's mesh in consistent contact with your back. Every micro-adjustment you make here helps in pack sway reduction, making the load feel much lighter than it actually is. It’s also worth remembering that outdoor gear experts typically recommend that a fully loaded backpacking pack should not exceed 20% to 25% of the hiker's total body weight.
Backpacking Pack Fit Troubleshooting
Even with a systematic approach, you might encounter discomfort on the trail. Use the following guide to identify symptoms and apply mechanical solutions.
| Symptom | Probable Cause | Mechanical Solution |
|---|---|---|
| Sore Shoulders | Hip belt too loose or torso too short | Tighten hip belt; increase torso length setting |
| Numbness in fingers | Shoulder straps too tight | Loosen shoulder straps; check load lifter tension |
| Lower back pain | Lumbar pad misplaced | Adjust hip belt height; check pack loading |
| Pack swaying side-to-side | Loose compression straps | Tighten side straps and sternum strap |
| Gaps above shoulders | Torso length too long | Decrease torso length setting; loosen load lifters |
If you feel your pack "bouncing" against your back, it usually means the load is too far away from your spine. Re-tightening the load lifters or repositioning heavier items closer to the back panel inside the pack can solve this. Remember that backpacking pack fit troubleshooting is a dynamic process; as you consume food and water, the weight of the pack changes, and you will likely need to make micro-adjustments throughout the day to maintain thru-hiking ergonomics.

FAQ
How do you measure your torso length for a backpack?
To measure your torso length, find the C7 vertebra at the base of your neck and the iliac crest at the top of your hip bones. Use a flexible tape measure to find the distance between these two points along the curve of your spine. This vertical measurement is the key to choosing the correct size of pack, regardless of your total height.
Where should the hip belt sit on a backpacking pack?
The hip belt should sit directly over your iliac crest, which is the bony top portion of your hips. The lumbar padding should nestle into the small of your back. When tightened, the belt should wrap around your hip bones so that the skeletal structure of your pelvis carries the majority of the weight rather than your waist or shoulders.
How much weight should be on your shoulders versus your hips?
The ideal weight distribution for a backpacking pack is roughly 80% on the hips and 20% on the shoulders. The shoulder straps should mainly serve to keep the pack close to your back and provide stability, while the hip belt acts as the primary load-bearing component.
What are load lifter straps and how do you adjust them?
Load lifter straps connect the top of the shoulder harness to the upper frame of the pack. They are used to pull the top of the pack closer to your center of gravity to prevent the load from pulling backward. You adjust them by pulling the webbing until the straps sit at a 45-degree angle, making sure they are snug but not lifting the shoulder straps off your body.
How do I know if my backpack is too big or too small?
Your backpack is likely too big if the hip belt padding overlaps when tightened or if there is a large gap between the top of the shoulder straps and your back that cannot be closed. It is too small if the hip belt sits above your hip bones on your waist or if the shoulder straps wrap too far behind your back, causing the load lifters to sit at a flat or downward angle.
Before you head out on your next adventure, take the time to do a "test hike" around the neighborhood with a fully loaded pack. Pay attention to how the weight shifts and don't be afraid to pull on different straps to see how they affect the feel. Mastery over your equipment is just as important as the physical training you do for the trail. Once you have dialed in your backpacking pack fit, you can focus less on your gear and more on the horizon ahead.